Hi folks,
How much of a pain is it to take out the air filter? I assume all the front bodywork needs to come off - is this is fiddly as it looks?! I'm planning a full service next week, and the filter is overdue doing.
Thanks,
Nik
Air filter removal - 1100S
Moderators: slparry, Gromit, Paul
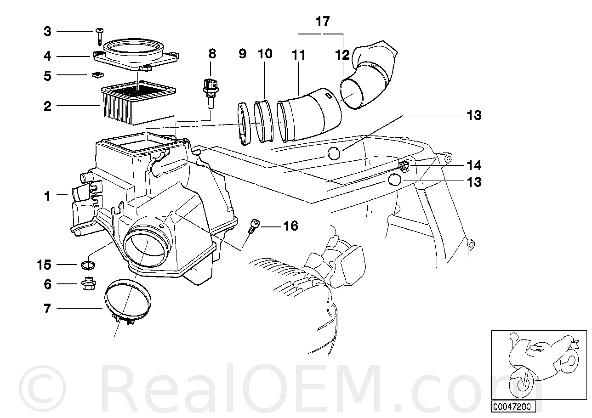
Yes, front body work, lift the tank a little bit to get a bit more space for ye tools. Fastners out, lift the intake tube off and remove the filter taking care not to drop any flies into the airbox.
You can of course remove the tank tank completely to make a proper job of it and wipe out any oil in the bottom of the airbox.
You can of course remove the tank tank completely to make a proper job of it and wipe out any oil in the bottom of the airbox.
'Let me check my concernometer.'

Bodywork is not so bad once you have done it once. The visible screws are obvious but don't mix up the indicator pod screws with the others (they have plastic washers). With all the visible screws removed and the top toggle fixing undone you need to find the two concealed screws either side of the oil cooler aperture and the two hard to get at screws behind the BMW roundels.
Once all the screws are out simply lift the one half of bodywork up (can't remember if its left hand side or right hand side first but the toggle fixing will let you know) and away, remembering to disconnect the indicator lamp assembly from the pod (simply twist and pull) a third hand is always useful at this point to hold the bodywork.
With bodywork off lift the tank as described above. Always worth propping the rear of the tank up to give better access.
Good luck.
DT
Ride like your life depended on it.
2002 BCR
2002 BCR
-
metropolis2k
- Posts: 380
- Joined: Sun May 26, 2013 4:47 pm
- Location: London
As others have said it's not bad when you're used to it. I've whipped off my tank to keep the battery on a charger over winter. I don't have any plug sockets in my communal car park and for some reason the missus doesn't want it in the flat.
Depending on the service you might be needing to get in the fuel tank anyway to replace the fuel filter so you can make a proper day of it!
Depending on the service you might be needing to get in the fuel tank anyway to replace the fuel filter so you can make a proper day of it!
2000 BMW R1150GS
2004 BMW R1100SS Boxer Cup Replica
2003 Yamaha R6 (trackday bike)
2004 BMW R1100SS Boxer Cup Replica
2003 Yamaha R6 (trackday bike)
Fiddly pain
Take a Valium...left side first, a fine blade to remove indicator lens's, turn out bulbs then have a flexible screwdriver to access screws behind BMW roundels and at front of fairing. Hole in hook shaped thing left of orange bulb is back of roundel.
[ ][/img]

[
 ][/img]
 2009 HP2 Sport...sold
2006 R1200s with yellow rim tape
2008 Ducati Monster S4RS Tricolore..sold
2004 R1100s BoxerCup Replika..sold
2006 Subaru WRX STI S204 #318/600
2006 R1200s with yellow rim tape
2008 Ducati Monster S4RS Tricolore..sold
2004 R1100s BoxerCup Replika..sold
2006 Subaru WRX STI S204 #318/600
-
dave the german
- Member
- Posts: 3644
- Joined: Tue Nov 01, 2005 4:35 am
- Location: North East
-
metropolis2k
- Posts: 380
- Joined: Sun May 26, 2013 4:47 pm
- Location: London
I managed it without any issues the first time. There's a couple of helpful videos I watched (one is about the GS but the internals of the tank are the same).Motocod wrote:Funnily enough I did think I should do the fuel filter while I've got everything off - is it straightforward?
Thanks all, this forum is most excellent, as always!
Nik
https://www.youtube.com/watch?v=1bl3H89xtS8
https://www.youtube.com/watch?v=9VDs3YrIZoo
2000 BMW R1150GS
2004 BMW R1100SS Boxer Cup Replica
2003 Yamaha R6 (trackday bike)
2004 BMW R1100SS Boxer Cup Replica
2003 Yamaha R6 (trackday bike)
-
metropolis2k
- Posts: 380
- Joined: Sun May 26, 2013 4:47 pm
- Location: London
Re: Fiddly pain
I found it much easier to unplug the indicators where they connect to the loom, on either side of the front fairing frame (although it's also very easy to forget to plug them back in again!)Mitch1100 wrote:Take a Valium...left side first, a fine blade to remove indicator lens's, turn out bulbs then have a flexible screwdriver to access screws behind BMW roundels and at front of fairing. Hole in hook shaped thing left of orange bulb is back of roundel.
2000 BMW R1150GS
2004 BMW R1100SS Boxer Cup Replica
2003 Yamaha R6 (trackday bike)
2004 BMW R1100SS Boxer Cup Replica
2003 Yamaha R6 (trackday bike)
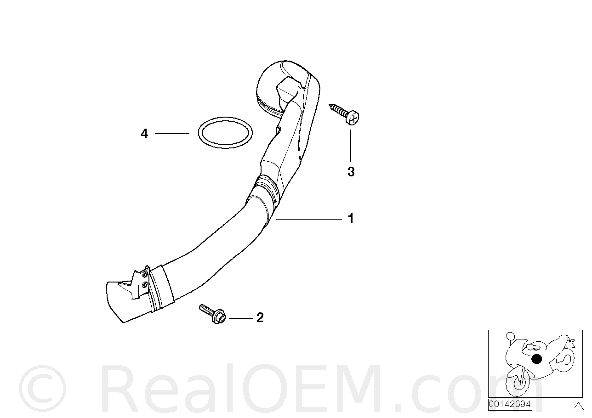
Thanks for that. I see the fuel pipes have those stupid clips that are fiddly as hell to re-attach... Starting to think it might be a job to avoid for that very reason!metropolis2k wrote:I managed it without any issues the first time. There's a couple of helpful videos I watched (one is about the GS but the internals of the tank are the same).Motocod wrote:Funnily enough I did think I should do the fuel filter while I've got everything off - is it straightforward?
Thanks all, this forum is most excellent, as always!
Nik
https://www.youtube.com/watch?v=1bl3H89xtS8
https://www.youtube.com/watch?v=9VDs3YrIZoo
Nik
I did the fuel filter but it is a bit of a phaff. A cup of tea is your best tool when trying to reinsert the pump into the tank. Talk about a Chinese puzzle  The only think that gets you through is knowing that were able to take it out in the first place.
I was also going to fit quick release connectors to the fuel lines but gave up as I couldn't find enough room to site them. In reality the tank needs to come off so infrequently that it is just as easy to stay with the original design.
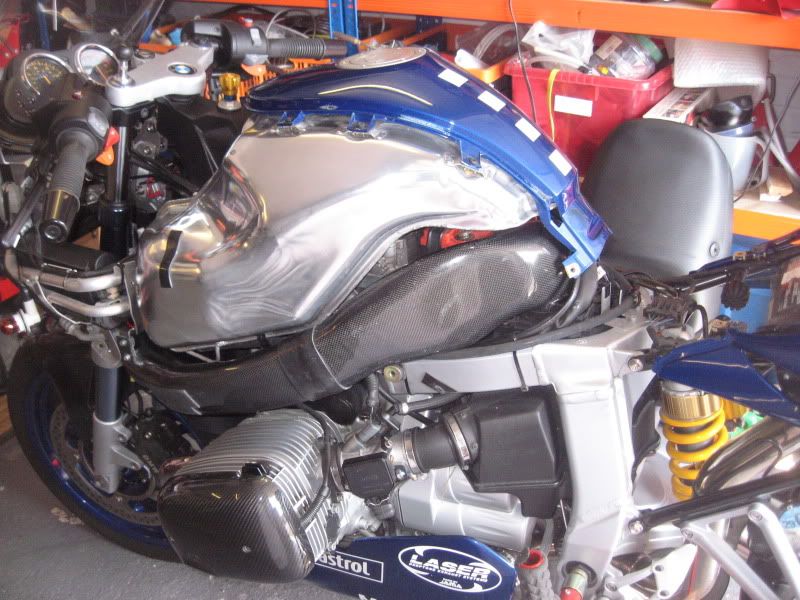
Don't forget to polish the alloy tank to a mirror finish before you put the bodywork back on
I was also going to fit quick release connectors to the fuel lines but gave up as I couldn't find enough room to site them. In reality the tank needs to come off so infrequently that it is just as easy to stay with the original design.
Don't forget to polish the alloy tank to a mirror finish before you put the bodywork back on

Ride like your life depended on it.
2002 BCR
2002 BCR
-
metropolis2k
- Posts: 380
- Joined: Sun May 26, 2013 4:47 pm
- Location: London
Ah yes, my GS has those and they're a pain. Fortunately my BCR has quick disconnects (metal, not plastic). I must fit them on the GS at some point.Motocod wrote: Thanks for that. I see the fuel pipes have those stupid clips that are fiddly as hell to re-attach... Starting to think it might be a job to avoid for that very reason!
Nik
2000 BMW R1150GS
2004 BMW R1100SS Boxer Cup Replica
2003 Yamaha R6 (trackday bike)
2004 BMW R1100SS Boxer Cup Replica
2003 Yamaha R6 (trackday bike)