 Untitled by Brian Freitag, on Flickr
 Untitled by Brian Freitag, on Flickr
I'm not very tall so I don't need the legroom and I grind the pegs on an almost daily basis.
How do I remove the brackets and put it back to "normal"?
Ideas?
Moderators: Gromit, Paul, slparry
Untitled by Brian Freitag, on Flickr
Untitled by Brian Freitag, on Flickr

 Untitled by Brian Freitag, on Flickr

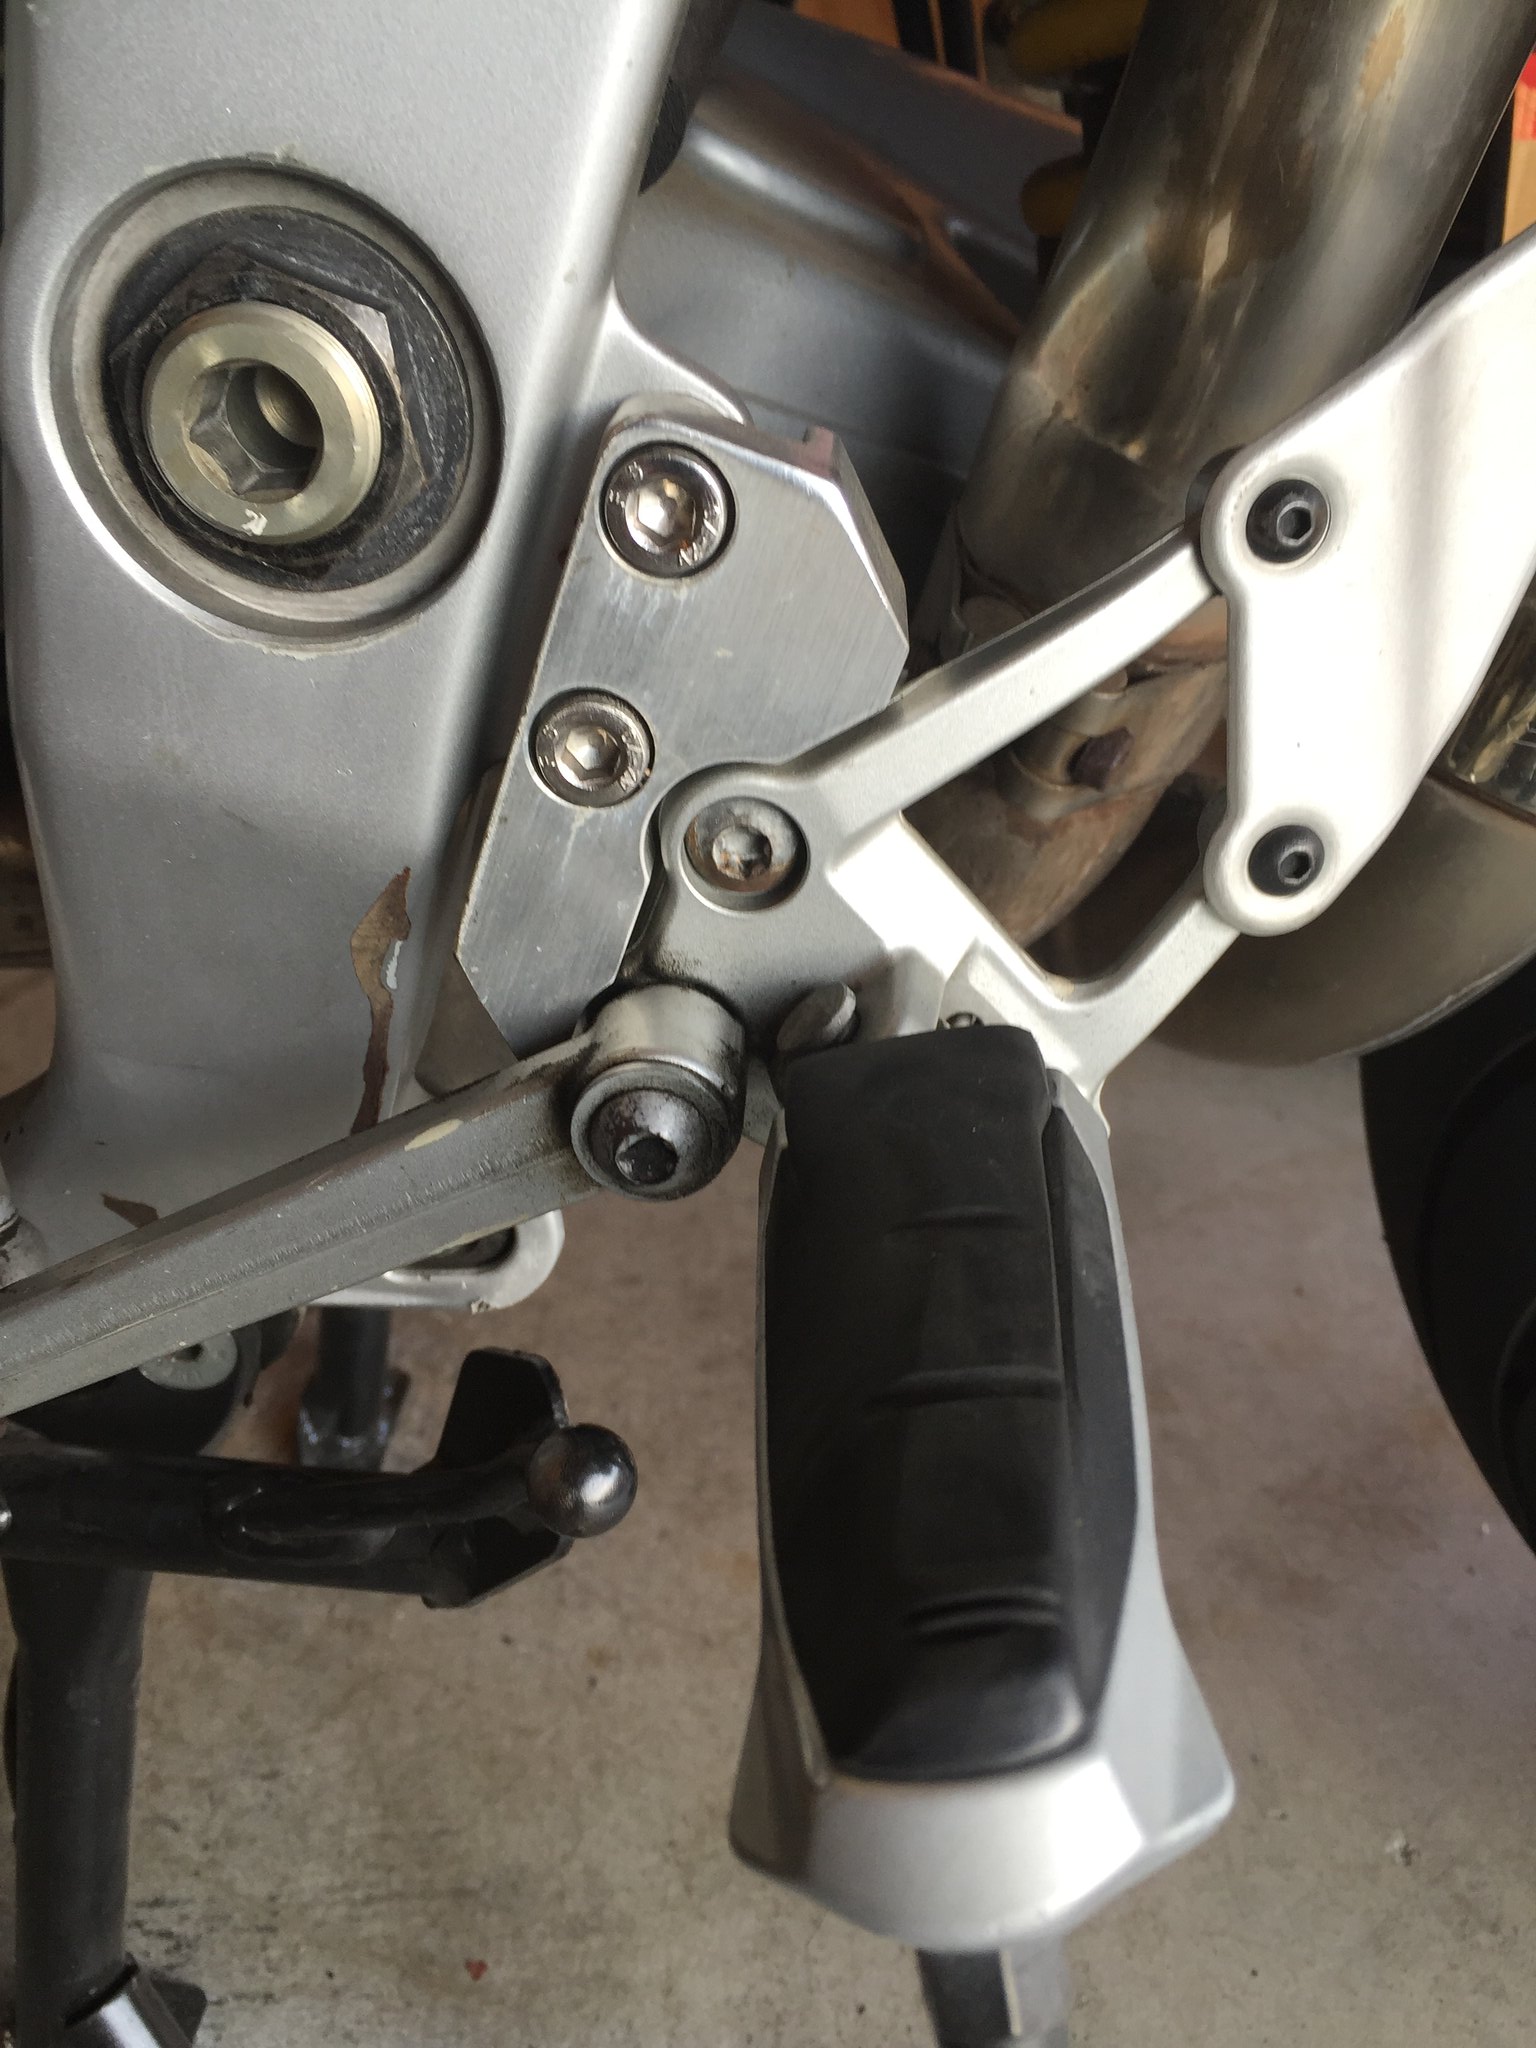
Dog Tyred wrote:Wot they said but you will also need to disconnect the brake cylinder from the foot peg assembly as the position of the cylinder is fixed due to the hard piping. It looks like there is an extension plate behind the cylinder to allow the foot peg to be position lower so this will need to be removed as well.
Hard to tell from the photo but there must be some form of extender to the cylinder activation rod (?) as simply moving the whole foot peg assembly up while maintaining the original cylinder position will reduce the length of the operating rod considerably?
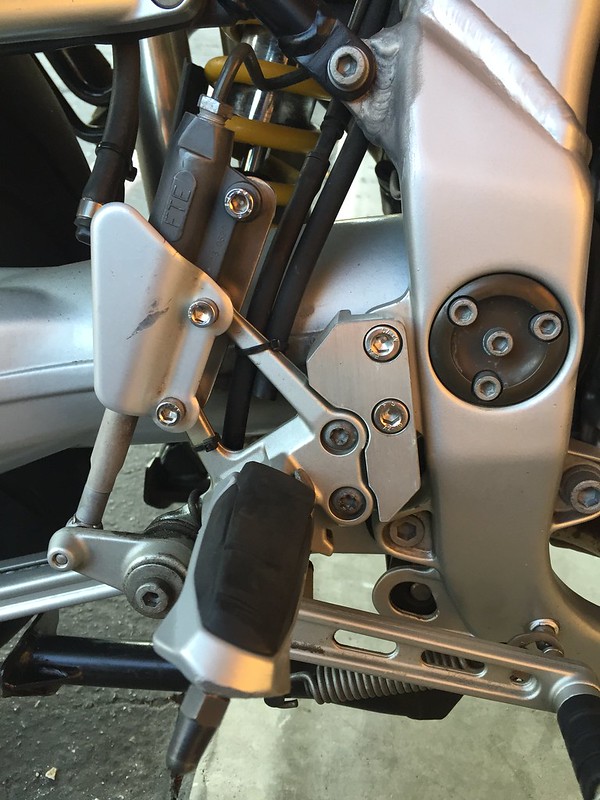
This is what it is supposed to look like although the rear end of your brake lever looks a bit different to mine.
As an aside it looks like the rear sub-frame mounting lug has been welded back on at some point in the past
DT
Dog Tyred wrote:
As an aside it looks like the rear sub-frame mounting lug has been welded back on at some point in the past
DT
jeznewsome wrote:Do you not just need to remove the adapter brackets and re-attach the original footpeg assembly to the frame?
Dog Tyred wrote:Wot they said but you will also need to disconnect the brake cylinder from the foot peg assembly as the position of the cylinder is fixed due to the hard piping. It looks like there is an extension plate behind the cylinder to allow the foot peg to be position lower so this will need to be removed as well.
Hard to tell from the photo but there must be some form of extender to the cylinder activation rod (?) as simply moving the whole foot peg assembly up while maintaining the original cylinder position will reduce the length of the operating rod considerably?
This is what it is supposed to look like although the rear end of your brake lever looks a bit different to mine.
As an aside it looks like the rear sub-frame mounting lug has been welded back on at some point in the past
DT
f90x wrote:Dog Tyred wrote:Wot they said but you will also need to disconnect the brake cylinder from the foot peg assembly as the position of the cylinder is fixed due to the hard piping. It looks like there is an extension plate behind the cylinder to allow the foot peg to be position lower so this will need to be removed as well.
Hard to tell from the photo but there must be some form of extender to the cylinder activation rod (?) as simply moving the whole foot peg assembly up while maintaining the original cylinder position will reduce the length of the operating rod considerably?
This is what it is supposed to look like although the rear end of your brake lever looks a bit different to mine.
As an aside it looks like the rear sub-frame mounting lug has been welded back on at some point in the past
DT
Greg, I can se a tint dot of dirt on the exhaust but I'm not telling you where.
Users browsing this forum: No registered users and 30 guests